Saanich Peninsula Hospital
Memory Garden
1947 Chrysler Royal
Project Car for the Long Term Care Unit
The Saanich Peninsula Hospital purchased the car and in cooperation with the Torque Masters Car Club of Sidney British Columbia, it will be put in their Memory Garden. It's main purpose will be for people with memory issues to help them bring back a few good old memories of days gone by.
The car will be strictly a "static car" so although it will have the original engine still under the hood, it along with many of the other features of the car will be non-functional.

Thank you to every business and the individuals who helped put this project together over the two years that it took to complete. This list is in no particular order.
Cam McLennan * for the use of his shop and tools for the two year project.
Ken Coward * for organizing and coordinating the whole project with the Saanich Peninsula Hospital for the funding. Also for fabricating various items on the car.
Don Carscadden * for his generous financial contribution.
Jetstream Custom Auto * for the body repair and paint job and lowering the front end.
Dave of Eagle Eye Towing * for his generous help moving the car when needed.
Chuck Lovallo * for the disassembly of the car.
Rod Allan * for the disassembly of the car.
Lyle Soetaert * for the removal of the engine and transmission.
Dave Smethurst * for the disassembly of the car.
Dave Pollack * for supplying the spare tire and rim.
Jamie Cox * for purchasing most of the items needed coming from south of the border and for organizing and coordinating the involvement of the various contributing businesses.
Sherrill Cox * for hand painting the hub caps and various badges.
Jamie and Sherrill Cox * for their generous financial contribution.
Ted Abel * for assisting with the installation of the trunk and belt line SS trim.
James Brooks * for the installation of the driveshaft and assisting with the installation of the fender welting and rear fenders.
Grant Hopkins * for supplying the trunk carpeting.
Chris Webb * for the use of his truck to go get the car from Duncan.
Rob Chalmers * for the use of his trailer to bring the car down from Duncan.
Steve Wright * for supplying the trunk liner.
Electro Shine Metal Finishing * for the chrome plating of the bumperettes, door handles, front fender trim pieces and the headlight rings.
Strait Metal * for the fabrication of the door sill plates.
Peninsula Tireland * for mounting the new tires on the old rims.
Rightway Heritage Trimming * for the front and rear seat upholstery.
Cam, Rawleigh, and Mark * for helping with the installation of the hood.
Victoria Plating * for chroming the front and rear bumpers.
Capital Auto Glass Sidney * for making the front windows and for installing front and back windows.
Lordco Langford * for donating a brand new 6 volt battery to complete the authentic look under the hood.


Picking up the car in June 2019 and bringing it to Sidney
The car was taken to Cam McLennan's shop, where extensive work was performed to make it the car it is today. Cam, who was the long time president of Torgue Masters graciously allowed the car to be worked on in his shop using all his tools. This process has taken much longer than thought, due to the extra amount of changes made to the car as well as the Covid-19 situation.

So in total the car has been in Cam's shop for almost 2 years. With the exception of the time that it went to Jetstream Custom Auto in Sidney where it was having body work done to it as well as a paint job for about 8 months.
During the Sidney Car show in August of 2019, the car was exhibited along with all the other cars. Donations for the reconstruction of the car were being excepted by Chuck, one of the Torque Masters club members.

The dash was in rough shape and back in those days it was the beginning of the introduction of plastics in the cars. The glove box had a plastic front on it but it was severely cracked. I don't think I've ever seen one that didn't crack. Later You will see the restoration process of rebuilding the glove box door.

Here we have Rod, another Torque Masters club member polishing up a piece of chrome fender trim. But in the end we decided to send those pieces and a few other items out to be Chrome plated at Electro Shine Metal Finishing in Sidney who graciously donated several thousands of dollars worth of chroming plating for the car.

By the time I arrived on the scene the car had already started to be disassembled. We were canvassing around for interested businesses who were willing to donate their time into the project for the Saanish Peninsula Hospital.
There were four primary jobs that needed to be addressed. The car needed some body work and a paint job. It needed considerable amount of rechroming, it needed complete interior upholstery, and it needed a new front windshield.

Dave is hiding behind the fender
and that's Truman in the foreground.
He enthusiastically oversees the whole operation.
Here's another shot of the early days of disassembly. The grill is out and the bumpers removed along with a lot of the side stainless steel moldings.

Cam and Jamie removing the engine and transmission.

The windshields both had cracks in them so they had to come out. However they were providing an extra amount of resistance so the decision was made to overcome that resistance.

The Bumpers
The bumpers had a few bumps and bruises as did the bumperettes. The following pictures will show my method of getting them back to a reasonable shape for the chrome shop to deal with.
The one bumperette that is at 90 degrees to the other four, shows the condition that they were all in before I picked up the ball peen hammer and started beating on them.
The end result after Electro Shine Metal Finishing was done with them.


I was fortunate enough to have a large round section of solid steel that I used as a dolly to secure on the inside of the bumpers which made getting them back into reasonable shape fairly easy.


Because of the extensive wrap around on these particular bumpers it meant they were too big to fit in the Victoria Plating chrome shop's tank. There were two options. Ship them to the mainland where a chrome shop had a tank big enough to hold them, but the cost would be several thousands of dollars for that. Or to cut them into three sections and the bumperettes would hide the cut. It was a matter of welding on connecting straps on the inside of the bumpers on one section and studs on the adjoining section.


The bumper cut into three sections and fitted back on the car after welding on the tabs and studs to make sure everything lined up.
After getting the bumpers and bumperettes back from the chrome shop and reassembled back on the car the only way you could tell the bumper had been split into 3 sections would be to look behind the bumperettes where you would see a split in the bumper.
This method would work fine for any car with bumperettes for the budget minded person. Obviously it would not be suitable for a show car.
Seat Upholstery


As you can see from the before pictures, the seats were is terrible shape. However the frame work and springs were quite good so the upholsterer had a good foundation to work from.
The seats were upholstered by Geoff Chrysler of Rightway Heritage Trimming in Victoria.
Interior Upholstery and Floor Carpeting
Fortunately I'm pretty handy with my old Pfaff industrial sewing machine and although I have done a number of marine related sewing of Sunbrella like boat covers and biminies, This was my first attempt at Auto upholstery. I decided that the seats might be a bit too much of a challenge for me.
My first task was to gather whatever we had in it's original shape and condition and lay it out for template purposes.
Then I made duplicate backings from the templates out of Masonite for all the panels, to determine how much vinyl was needed. I also allowed a little bit for the arm rests.

As for the carpeting, It went fairly easy and straightforward. I should mention that I had a significant advantage in doing all this work on the car since I own a 1948 Chrysler Windsor. It happens to be a four seater, but a lot of things are very similar. As for the carpeting, only a year earlier I replaced my own carpeting so I knew exactly how to shape it, according to it's original shape from the factory.

The armrests were a little bit of a challenge, but they were all there and I had my armrests form my car to use as a guide. At least for the front set. The back seat arm rests are quite different but I just took my time and the procedure went pretty smooth.
Back seat armrests


Front Seat Armrests
The front seat armrests are a bit unique in the method they used to mount them. They have a trap door on the bottom. One screw in the centre and it seals up the underside where the mounting screws are. The hinge is simply the vinyl. However one door was missing so I fabricated one using a product called Worbla. It's a thermoplastic that is about the thickness of a credit card. When it is heated with a heat gun, it softens. It can then be shaped and in about a minute it will keep that shape. I decided to double the thickness for the trap door.
The armrest on the left is right side up. The one on the right shows the bottom.
The trap door on the left is the original steel one. The one on the right is the thermoplastic stuff.
Shaping the lip on the door is critical for a tight fit. It was very easy to make that lip with the thermoplastic once it has heated up.


Side Panels
The old door panel coverings were not salvageable. However I could save the back seat panel covering enough to get an idea of it's size and the embossing that was on it.

The original side panels had some stainless steel frames that dressed up the panels and they also had embossing that also dressed them up. I opted to go with a very plain and simple look since we were missing the stainless steel trim pieces. I also felt that the way I made them will make it very easy to keep clean.
However I did stitch on a kicker strip across the bottom of floor carpeting to add a bit of authenticity to the door panels the same as it originally had.


Body and Paint Work Preparation
I tried a few different methods of getting the paint off the car in preperation for sending it off to the body and paint shop. Strippers was taking too long and it would have been somewhat costly to do the whole car. Grinding it off would have worked but it too was time consuming and very messy and created a lot of air polution.
I discovered that using razor blades was pretty fast and very efficient and without any health hazards.


After about 20 hours and about a half dozen razor blades I had a pile of paint shavings on the floor. Not much longer and I had it all down to bare metal.
Here the car is delivered to the body and paint shop and put in the media blasting room for final stripping in preparation for the body guys to take over.

Stainless Steel Trim Repair
Most of the stainless steel trim pieces were badly damaged with dints and one piece was actually driver over so it was flattened out pretty good. Recently I had the same issue with a pair of rear fender trim pieces that I got from an auto salvage yard in Wisconsin. I also got a set of wheel beauty rings from California that had many huge dints in them. So I taught myself how to get those bumps and bruises out. Most of it is delicate tapping and lots of patience.
I made a set of tools that made the job go smooth. Using a spring loaded centre punch and then making a set of various shaped pieces out of solid aluminium that fit onto the point of the punch.
The sudden impact would concentrate on either the highpoint or low point as opposed to hitting it with a hammer that usually would just add to the problem.

One of the rocker trim pieces had a significant flat spot on it.


I made up a mandrel to fit the inner profile of the trim piece out of Yew wood and gradually squeezed the trim back into shape.
Patience and persistence
is the key.


Another damaged area.

After repair and prior to sanding and polishing.

The finished rocker trim polished and installed.
New Tires
We came across a set of brand new 16" tires and inner tubes for the car. However they are a little tall so we'll have to drop the car down so it won't be difficult for people to get in and out of the car.
Canadian tire removed the old tires from the rims. They were then sent to Jetstream Custom Auto with the car so they could paint the rims the same colour as the car. Jetstream sent the tires and rims out to Peninsula Tireland and they mounted them at no charge.

After many hours of prepping the car and cutting out bad sections and welding in new body steel in many places the car is starting to get ready for the final top coat.

The car returns from the body and paint shop
Of course it had to be raining on the day it was returned. But that's ok, it's only water. Now it's time to role up my sleeves, jog my memory and try to remember how it all goes back together. I'm confident that I have a look of enthusiasm on my face and not a look of worry, about what goes where.

Due to Covid restrictions it was decided that I would finish off the car by myself. However there were times like putting on the rear fenders and slipping in the fender welt, where 4 hands were needed to insure perfect job results.
Engine and Transmission work
With the engine and transmission out of the car it was stripped of all the bolt on parts to prepare it for sandblasting.

The engine and transmission after sandblasting with a handheld gravity fed system. It was done outside the shop and all the used media was captured with tarps and it worked fairly efficiently.

The engine and transmission back in the shop and cleaned of all the sand blasting media and ready for paint.

The Engine and transmission was painted silver and all the bolt on items were painted Black which is the same colour scheme as it was from the factory.


Slipping the engine and transmission back into the car.
Sandblasting
Pretty much all the small items were sandblasted prior to painting them and reassembly.
I found this economic gravity fed blaster to work just fine. I made a sandblasting booth out of a cardboard box. In this picture I'm sandblasting the set of horns.
I also used the box as a paint booth for the same items.

Working with what we have
One of the plastic interior trim pieces that fits on to the door was missing a good portion of the corner of it. However the opposite side was in good shape. The pictures below show how I used that thermoplastic stuff to make a mold from the good one and then transferred it to the bad one. I lined it with wax paper and then coated it with some super fine epoxy cloth and some epoxy. Once it was set up I removed the thermoplastic mold and built up the area with more layers of epoxy cloth and epoxy until I got it to match and then skim coated it with body filler spot putty.


Headliner
The underside of the roof was first scraped and sanded to get as much rust off as possible. The it was coated with rust inverter. Then it was painted with a coat of grey rust paint. They it was painted with a coat of black rust paint.
We ordered a headliner online designed for this particular car. With the interior being brown I decided to go with an off white/cream colour to lighten up the interior a little bit.
There are 6 steel cross pieces called bows that were painted black. The headliner has pockets that the bows side through. This holds the headliner up and spaces it out.
I found it easier to install the bows upside down, then one by one flip them upright.


The next step is to clamp the ends to the lip on the window frames. Gradually pulling it tighter and tighter and adjusting the clamps.
The next step is to add steam to the headliner and gradually work out wrinkles.

I found that it's best to start on one of the sections just back of the door openings. I stretched from side to side and towards the back alternatively, so as not to add anymore wrinkles.
I used sheet metal screws and drilled holes in the window lips where it will be hidden by the interior garnish moldings.
Several times the screws would be removed and the material stretched a little further and then screwed back in.

Once I get all the wrinkles out and I'm satisfied with the position of the headliner. I'll replace the sheet metal screws with rivets going through continuous brass strapping. In this particular car there are no tack strips around the rear window or the back side windows. So I'm not sure how it was fastened from the factory since there was no evidence of a headliner in the car when we got it.


The reason I'm leaving the section above the doors to last is because they have a different method of securing the headliner. The "sharks teeth" strips are screwed above the door opening tight against the windlace. The headliner is pushed up past the sharks teeth with a plastic putty spreader. The teeth grip it and hold it in place. the procedure can be done a few times but not too much because there isn't much room behind the sharks teeth strip for a lot of vinyl. So I want to stretch it out as much as possible and cut off the excess except for maybe an inch.
If a professional gives you a quote to install a headliner for you an it seems expensive, trust me, go for it. It is a lot more complicated than it seems. Getting all the wrinkles and creases out is very time consuming. The headliner we got from the USA was meant for this car but it was poorly stitched or perhaps the templates have flaws in them as you will see below.
Once I had the headliner stretched out tight from front to back I started on the drivers side. You can see that there are many wrinkles, but eventually they all got worked out.

The wrinkles over the door where the seams are, will have to remain due to the design of how the headliner is held in place over the door, as mentioned below. I learned how to overcome this when I switched to the passenger side. As mentioned below.
Here is an example of the poor or improper stitching of the headliner. In order to get the wrinkles out of the headliner to the left of the seam you would have to pull down and to the right. But this would add wrinkles to the material on the right of the seam.

You can see the horizontal fold and a couple sheet metal screws. Below that is extra material and behind it is the side rear window.
So my solution to this was to cut the threads about 2 or 3 inches up and overlap the material. Securing the material with contact cement and then stretching and fastening it under the window lip with the sheet metal screws.


The two images above are where the headliner meets the windlace just above the doors. By design the method of hiding the fastening of the headliner, is done with the combination of the shark tooth strips I mentioned earlier and the somewhat flexible windlace. Which is the two tone rope looking stuff.
The plastic putty knife is pushing the headliner up under the sharks tooth strip. The teeth grab hold of it and prevent the headliner from coming out. The key to being successful here is through experience. Once you push the headliner up behind the sharks tooth strip, you can't get it back out. You would have to destroy the entire headliner. So you have to guess at just how much you want to push it up. If you push too much it will cause too much tension and create a wrinkle to the left or right. Once you think you're pretty close you cut off the excess material as in the image on the left and then push the little bit remaining up under the tooth strip. There is only about a 1/4" of room under there for excess material so you have to be sue you have the exact amount.


Another "trick of the trade" is that when the headliner is made they leave lots of extra material. Sewn into the back of the headliner at each seam is a pocket of cloth material going from side to side that the bow runs through. This is called lacing and it keeps the headliner up tight to the bow. So they also stitch extra amount of that along the extra headliner material. You have to cut that away so that the headliner can be stretched from side to side. The image on the left shows the lacing stopping the headliner from coming down any further past where the bow ends. The image on the right shows how much I had to cut away the lacing.
It is very critical to cut exactly the right amount away. Now enough, and the headliner will bunch up where the bow stops. Cut away too much and the headliner will pull away from the bow and look loose. It's a matter of cutting about a 1/16" at a time and stretching the headliner, and the doing it again and again until you get the right amount cut away.
The passenger side turned out much better. But each seam had to have the seam stitching cut back about 2 to 4 inches and bonded with contact cement.
These old girls sat up on their wheels pretty high. Not very easy to get in especially if you have some mobility issues. So we decided to lower the car. Before lowering it the step from the ground was about 16 inches. I dropped the rear end about 6 1/4" so now it's a lot better but it might still be an issue. However the differential is only about an inch from the underside of the floor now. So I've gone about as far as I can go.
I welded up some old bed from rails and with a bit of grunting and groaning got the job completed.


On the left is the block I built to go between the axle and the leaf springs. On the right, is the amount I had to add to the U bolts holding the leaf springs to the axle housing.


On the left you can see the lowering block and extended U bolts in place On the right you can see that it is quite low compared to the pictures above before it was lowered. Now we just have to lower the front end by heating up the coil springs.


The turn signal knob was missing when we got the car and the shift knob was in really poor condition so I turned a new set using my wood lathe. I used a block of dark cream acrylic.

The hood finally went on the car which was the last piece of the puzzle besides installing the floor pan and seats. Thanks to the employees of Island Pro Landscaping it went smooth. Having 4 guys in install one of these long hoods makes for a straight forward install.


New Floor Pan
In the picture on the right you can see the original floor pan just under the steering wheel. It's about 2 ft. x 3 ft. Somehow it disappeared.

So Ken got some body steel and fabricated a new one, and I decided to weld it in position as opposed to bolting it down, since the transmission area would never need servicing.

Glass replacement


The back window was in good shape but it needed a new rubber seal. So that was ordered. The front windshield needed new glass both sides so Capitol Glass Sidney stepped up and volunteered their time and expenses to replace the glass. A new rubber seal was ordered for it too.
The sunvisors were in terrible shape but the unique end clip for the trim strip were there for both visors so I used the original hardboard and fabricated the rest to look as close as possible to original.

With the front seat installed the only thing left is the door sill plates which are being fabricated by Strait Metal.

Window weatherstripping improvised
The no-draft weatherstripping was worn out, so I used a scrap of the trunk liner and glued it in using 3M 08008 adhesive. The "fuzzie" as it is commonly called looks and feels just like the real thing.


I scraped out all the old weatherstripping but left the metal base for it so I could adhere the trunk liner to it. Then I cut some wood strips the full length of the track to make an overall pressure on the trunk liner for better contact surface and to not leave any marks from the clamps.
I used the same method for the outside of the side windows. After the car was finished I washed the car and the strips of trunk liner did their job and I didn't see any signs of water getting in.
The Trunk


In order to remove the gas tank, we found it easier to cut a section out of the trunk floor. Then Ken fabricated a new section and welded it in place.
The trunk floor was lined with new carpeting thanks to Grant Hopkins and we used black coroplast to cover the back of the back seat. The rim for the spare was even painted by Jetstream Custom Auto.


Lifting the car off the ground
The car went back to Jetstream for a final polish and while they had it they heated up the front coil springs and the front of the car dropped down to match the lowered back end of the car.
So now that we have the car down as far as possible so it won't be too much of a step for people to get into it, we need to suspend the car so it is raised ever so slightly but looks the same. This way if over time any of the tires should loose some air pressure the car won't drop down on the tire. Also the way I designed the front supports the car will steer while sitting still with very little resistance on the steering wheel. That way people can enjoy the process of steering the car.
This is the rear lift support, and it slides between the extended U-bolt nuts.


Here you can see one of the front lift supports and it is tucked up into a recess in the lower control arm.
These are the four lift supports that hold the car slightly suspended off the ground, but not noticeable.


I've tried to rock the car side to side as well as front to back and it is as stable or even more stable while on the lifts as shown in this picture.
April 20th 2021
All finished and ready for delivery
July 2022
Delivery of the car to the Memorial Garden


Myself, Ken the current President, and Cam the past President of Torque Masters Car Club with Karen the Hospital Director who suggested the project to our car club.
One of the Long Term Care patients enjoying the car for the first time at the grand unveiling being interviewed by the local TV station.
The process of this project has been long and drawn out due to Covid, and the restrictions have understandably been very tight at the Hospital. We are still waiting for the completion of the roof that will cover the car.
June 1 2023
The Final Chapter
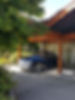
Finally we got the call from the Hospital to let us know that everything was finished in the Memory Garden and that we could position the car where it will remain for a long time to come. Previously I showed the stands that I built for the car to rest on so that the tires look like they are touching the ground. With the car suspended this way, when the tires begin to loose air there won't be any visible signs of that and in turn the tires won't suffer any sidewall wear and tear when that happens.
The car port like cover over the car, really looks nice. It covers the car quite well and I'm confident that it will protect it from rain and snow.
Now it's time for the long term care patients, to enjoy the car.